How to Install on a Server & Configure Excel (or Move to a different Location)
The Digital Records software can be stored on a File Server on you computer network.
You can either Map a drive to the folder located on your server or access it directly using the 'Universal Naming Convention' (UNC).
For example: 'Z:\My Digital Records\' or '\\MyServer\My Digital Records\'
How to Install
[Click here]Before you install, it is recommended that you view the 'System Requirements' page.
Create New Folder
Create a new folder on your File Server. For example, 'Z:\My Digital Records\' or '\\MyServer\My Digital Records\'.
Tip: You may wish to create a shortcut on your Windows Desktop, which points to this folder.
Note: The actual file name of the software will change when subsequent versions are released,
so the shortcut needs to point to the Folder and not the file.
Change Excel Configuration (Options/Trust Centre)
Microsoft has taken a much tighter approach to software security. As a result of this, some Excel features are disabled during initial installation.
In order for the Digital Records software to function correctly, a few changes are required within the Excel Options.
Open a blank workbook in Excel. (For recent versions of Excel, Click on 'File' menu, then 'Options', then 'Trust Centre' then click on 'Trust Centre Settings'). Note: For Office 2007, Click on the 'Office' button as the 'File' menu does not exist.
Macro Settings: Tick the box 'Trust Access to the VBA project model'.
ActiveX Settings: Highlight the Radio Button 'Prompt me before enabling all controls with minimum restrictions'.
Trusted Locations: Add the 'Location' of the folder where you saved the workbook,
(For example, 'Z:\My Digital Records"). Also tick the box 'Subfolders'.
Note: This action may not be possible where your network configuration prevents such changes.
If this is the case, then make sure you add the network location to your list of Trusted Sites (See below).
Then, click on the 'OK' button.
Finally, Exit Excel.
Add the network location to your list of Trusted Sites (Internet Options/Security/Trusted Sites/Sites)
Microsoft has taken a much tighter approach to software security when accessing software that is located within a network location.
In order for the Digital Records software to function correctly, please add the 'network location' or 'mapped drive letter' to the
list of 'Trusted Sites' within your Windows 'Internet Options'.
Your Internet Options can be found via the 'Control Panel' or by typing "Internet Options" within your Windows search box.
Within your Internet Options:
Click on the 'Security' tab.
Click on the 'Trusted Sites' Zone.
Click on the 'Sites' button.
For example, Type "\\MyServer\" or "K:\" in the box. (Excluding the speech marks)
Click on the 'Add' button.
Also ensure there is no tick within the box named 'Require server verification (https:) for all sites in the zone'.
Then click 'Close' followed by 'OK'
Add the NJT Website address to your list of Trusted Sites (Internet Options/Security/Trusted Sites/Sites)
Microsoft has taken a much tighter approach to software security when downloading software.
In order for the Digital Records software to function correctly, please add the NJT website address to the
list of 'Trusted Sites' within your Windows 'Internet Options'.
Your Internet Options can be found via the 'Control Panel' or by typing "Internet Options" within your Windows search box.
Within your Internet Options:
Click on the 'Security' tab.
Click on the 'Trusted Sites' Zone.
Click on the 'Sites' button.
Type "https://neilsonjamestech.co.uk/" in the box. (Excluding the speech marks)
Click on the 'Add' button.
Also tick the box named 'Require server verification (https:) for all sites in the zone'.
Then click 'Close' followed by 'OK'
Download Software to Folder
Download the 'NJT Digital Records', then (move or save) it to the folder you have just created.
Click on the button to download the MTD Digital Records software.
(For further information on purchasing, see the 'Software Purchase' section via the menu item 'Digital Records'.
Note 1: The download process may vary depending upon which Interent browser you use and the browser's configuration.
Note 2: It is recommended that you store the workbook within it's own folder
as certain sub folders are automatically created when it is opened.
Important Note:Under certain circumstances the software file may remain 'Blocked' or 'Read-only':
Open File explorer or Windows Explorer and navigate to the folder containing the software.
Right click on the software file then click on 'Properties'.
Remove the tick in the 'Read-Only' box where necessary.
Unblock the file by clicking on the 'Unblock' button or 'Unblock' Tick box where necessary.
Click 'OK'
Open Software
Finally, Open the 'NJT Digital Records' and follow the on-screen instructions.
Free Remote Support from NJT
If you are having difficulties installing the software, then you can contact NJT and arrange for assistance via the 'Remote log-in' service.
Run the software, then telephone NJT and give the 9-digit code when requested.
NJT will then remotely access your computer.
When the remote access session is complete, disconnect then exit the software.
Introduction
The Digital Records software can be stored on a Netwrok Drive or a central File Server.
You can either Map a drive to the folder located on your server or access it directly using the 'Universal Naming Convention' (UNC).
For example: 'Z:\My Digital Records\' or '\\MyServer\My Digital Records\'
The software within the Excel workbook, is a 'Single User' application. This means it can be opened for editing by only One User at any one time.
However, when an attempt is made to open the workbook that is already being used by another User, it can be opened in 'Read Only' or 'Notify' mode.
Whilst opened in 'Read Only' or 'Notify' mode, the User can view and navigate as normal, however, all updating functions are disabled.
Option 1: Open in 'Read Only' Mode
Whilst in 'Read Only' mode, You can use the software to navigate, search, print, save as PDF, and display payments and liabilities.
When complete, click on the 'Close' button on the Dashboard.
Option 2: Open in 'Notify' Mode
Whilst in 'Notify' mode, You can use the software to navigate, search, print, save as PDF, and display payments and liabilities.
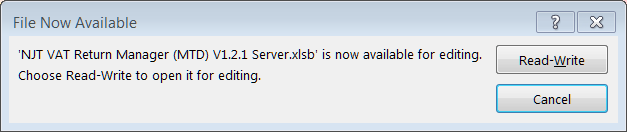
When the User, editing the software, saves and closes the workbook,
the 'File Now Available' message will be displayed and you will be prompted to re-open the workbook in 'Read-Write' mode or 'Cancel'.
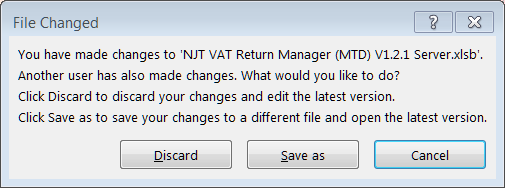
If you click on the 'Read-Write' button, the 'File Changed' message will be displayed.
If you click on the 'Cancel' button, you can close the workbook, via the 'Close' button.
Always click on the 'Discard' button. (See Important Note below).
The workbook will be re-opened and you can then continue as normal.
Important Note
When you open the workbook in 'Notify' mode, the software automatically refreshes certain information within the workbook.
Although this does not affect your data, Excel thinks the workbook has changed. Hence the 'File Changed' message.
Therefore you always click on the 'Discard' button.
Introduction:
Files created by this software are organised using a preset folder structure. Sub folders are created automatically within
the folder where the software is located. It is recommended that the Digital Records software is stored in a specific folder. For example,
"C:\My Digital Records".
Archive Folder:
The sub folder "\Archive" is automatically created when you first use the software.
After you have updated to a new version, this may be a convenient location to store your previous version.
This may avoid confusion as to which is your latest version.
Data Backup Folder:
Each backup created by the 'Backup Data' routine is stored in the sub folder "\Backup".
Bin Folder:
The sub folder "\Bin" is used to store technical log files created by the software.
These log files may assist in the resolution of technical issues that may occur during the use of the software.
CSV Exports:
This folder is used to store the transactions that can be exported into CSV files.
Tax Return Exports:
This folder is used to store the VAT Return and Income Tax 'Quarterly Update' files used by the NJT bridging software to submit to HMRC.
User Guide:
This folder is used to store the latest User Guide PDF file, which is downloaded automatically when the software is opened.